說明文件
 comments powered by Disqus
VMware Workstation 17 Player安裝Ubuntu 22.04和Windows 11共用資料夾
1.連續按兩下桌面的捷徑圖示,開啟VMware Player。
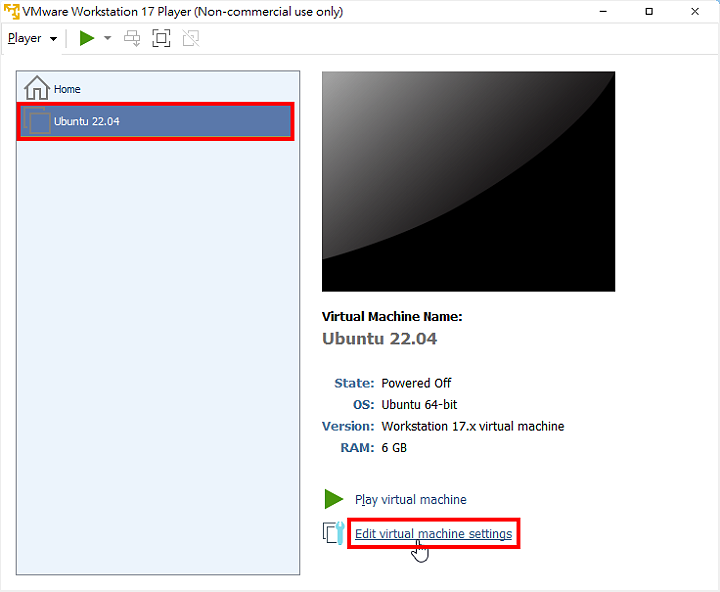
2.選擇Ubuntu 22.04虛擬機器,點選「Edit virtual machine settings」。
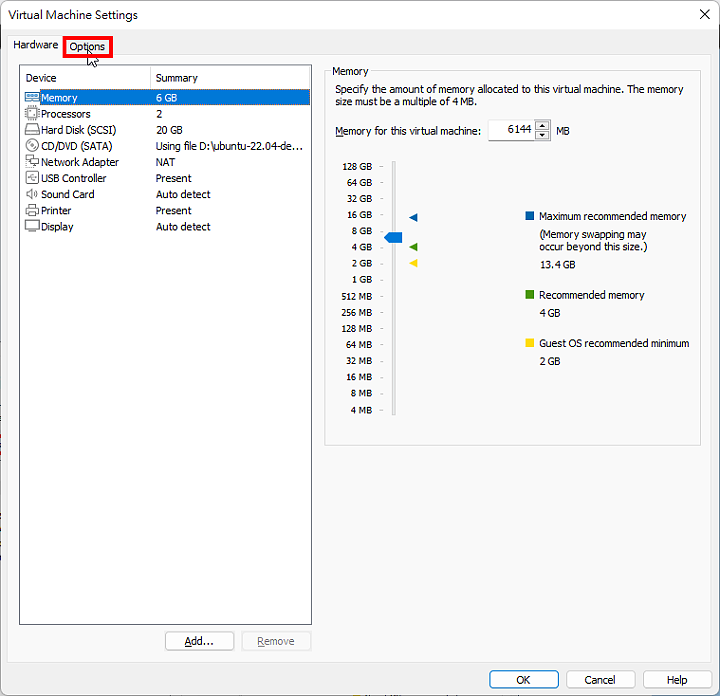
3.選擇「Options」的索引標籤。
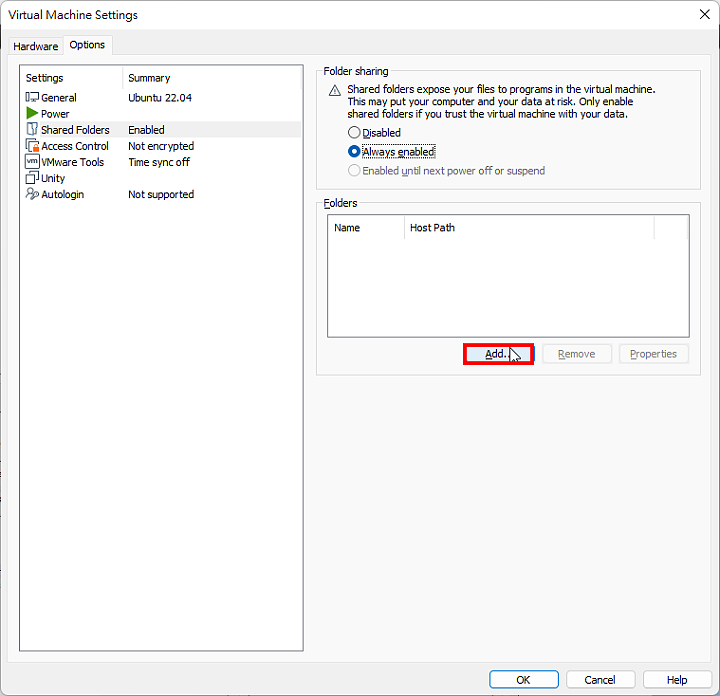
4.選擇「Shared Folders」,點選「Always enabled」。
5.點選「Add…」,準備設定分享的資料夾。
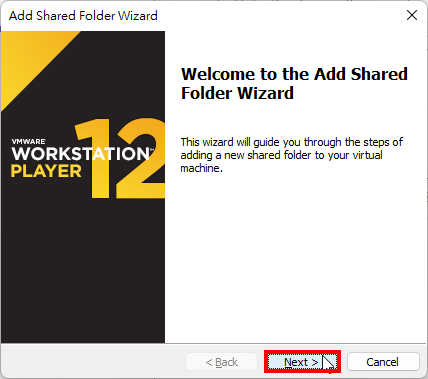
6.點選「Next」。
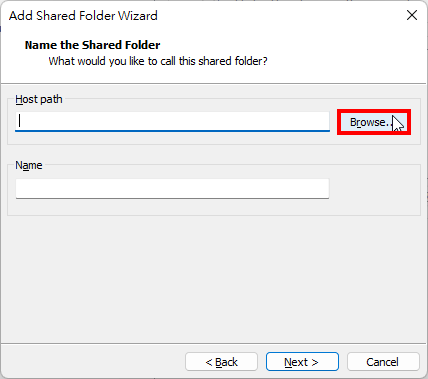
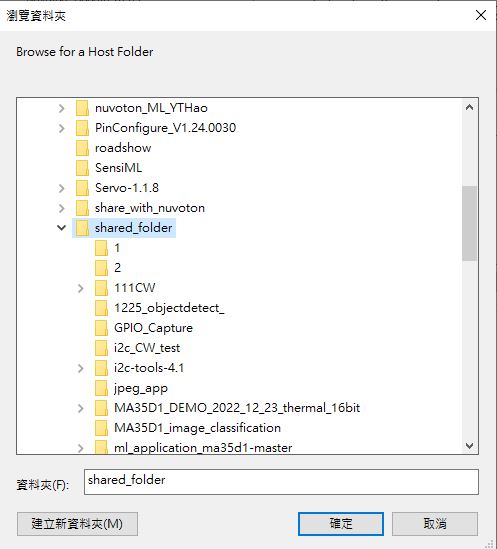
7.點選「Browse…」。
8.選取要分享的資料夾,點選「確定」。
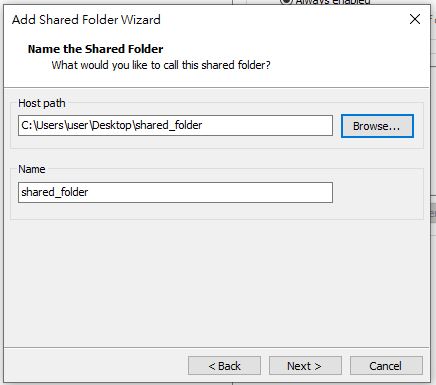
9.使用預設的名稱或自己輸入資料夾名稱,點選「Next」。
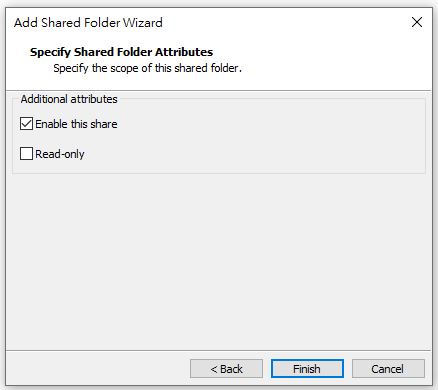
10.使用預設的選項「Enable this share」,點選「Finish」。
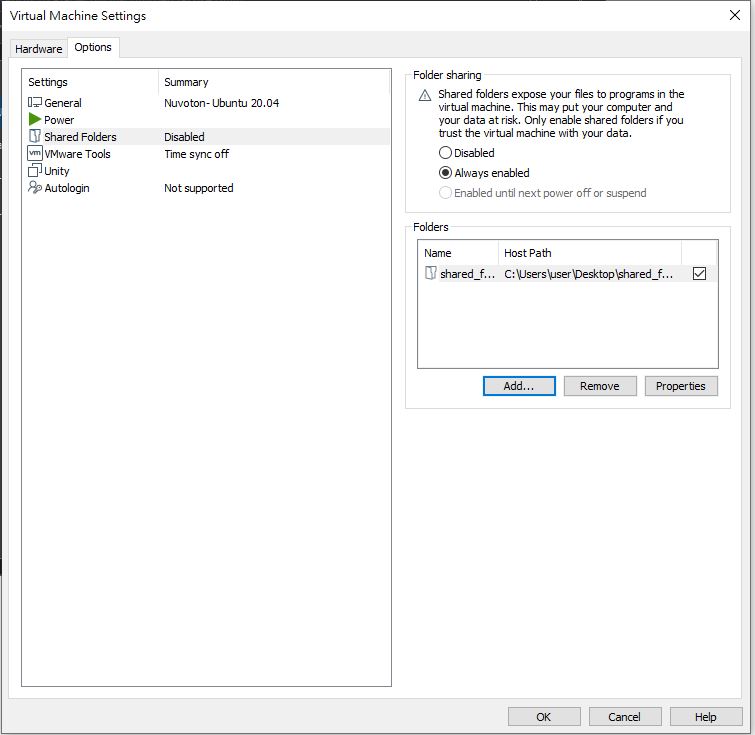
11.分享的資料夾已經設定完成,點選「OK」。
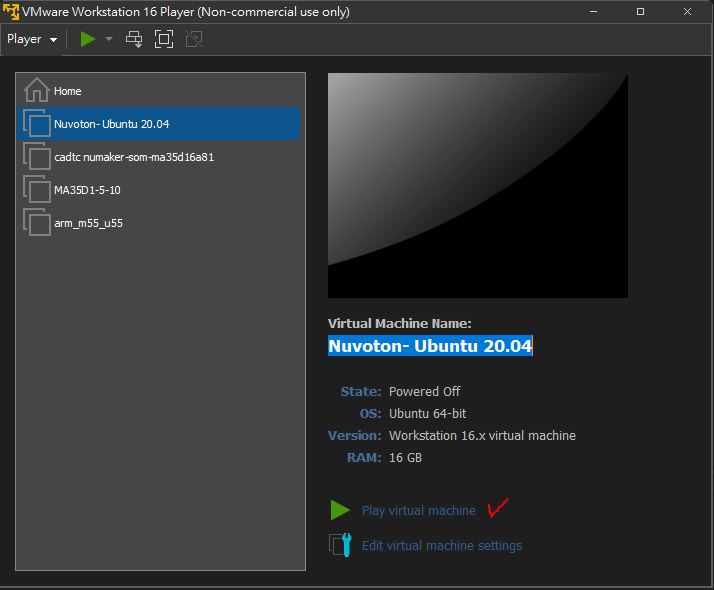
12.點選「Play virtual machine」,開啟Ubuntu 22.04。
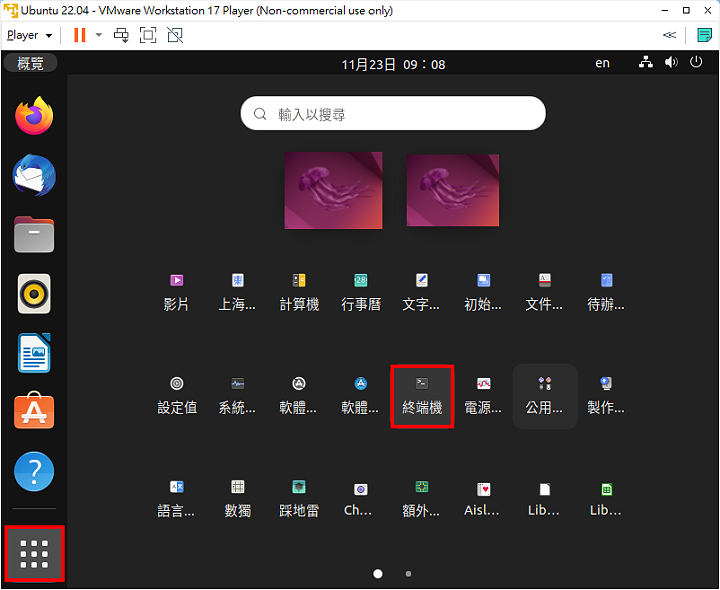
13.開啟Ubuntu以後,必須先掛載分享的資料夾才能瀏覽分享的檔案,點選「顯示應用程式」,選擇「終端機」。
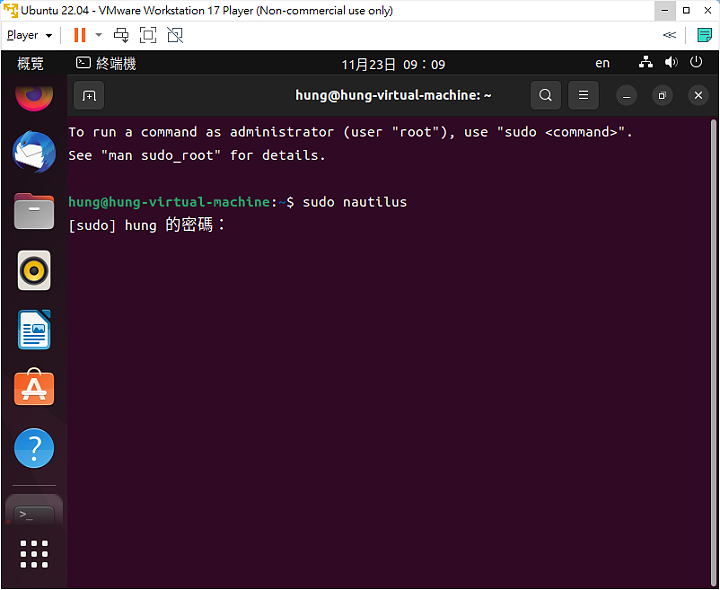
14.在終端機輸入「sudo nautilus」,按鍵盤的Enter鍵,輸入開機密碼,以root的身分開啟檔案總管,才能編輯與儲存要掛載的檔案。
sudo nautilus
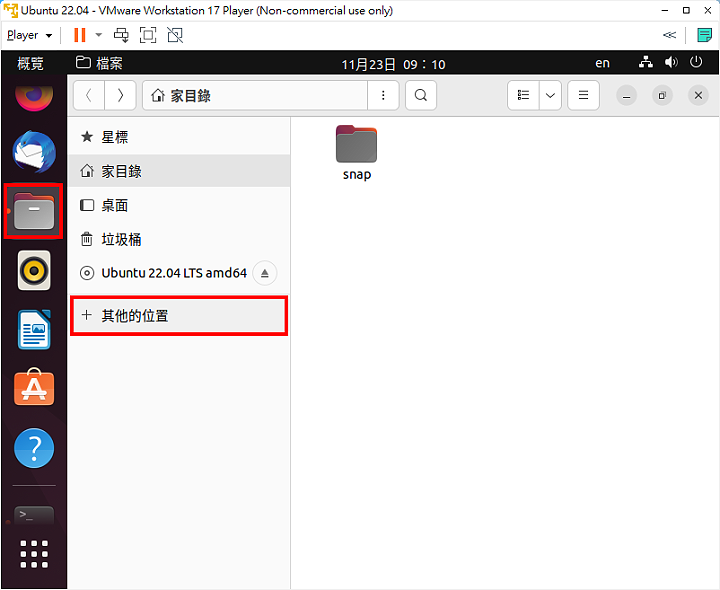
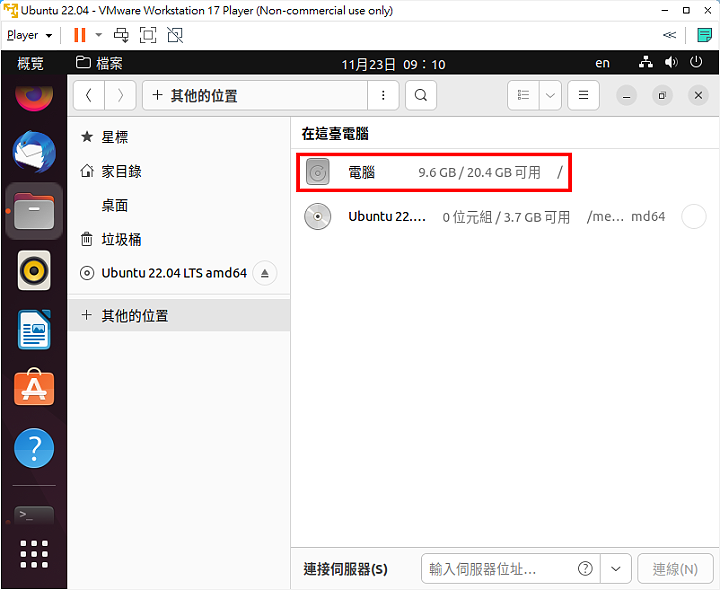
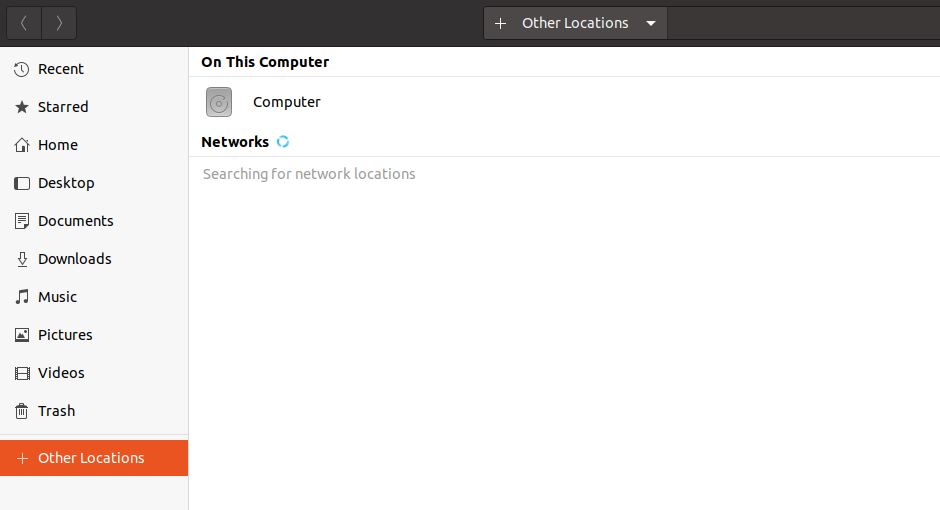
15.已經使用root身分開啟「檔案」,點選「其他的位置」。
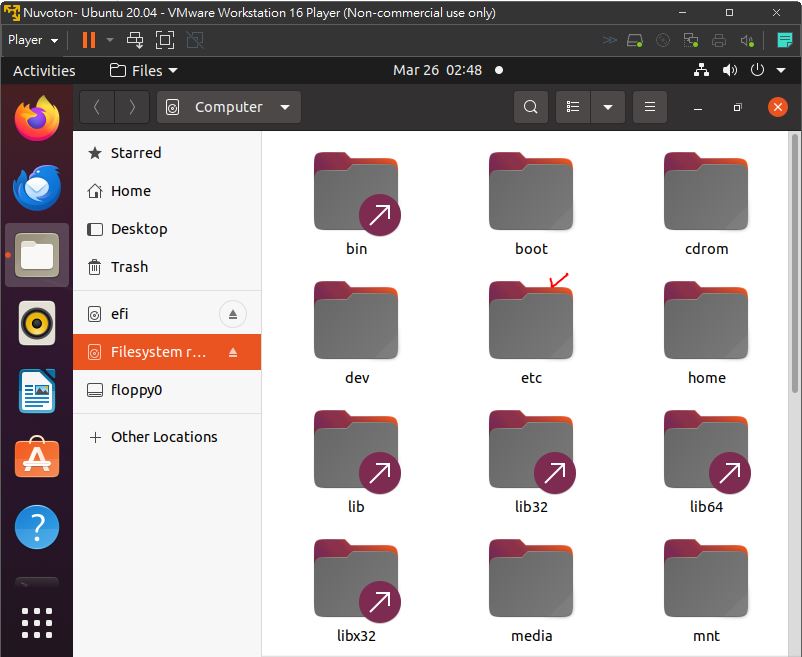
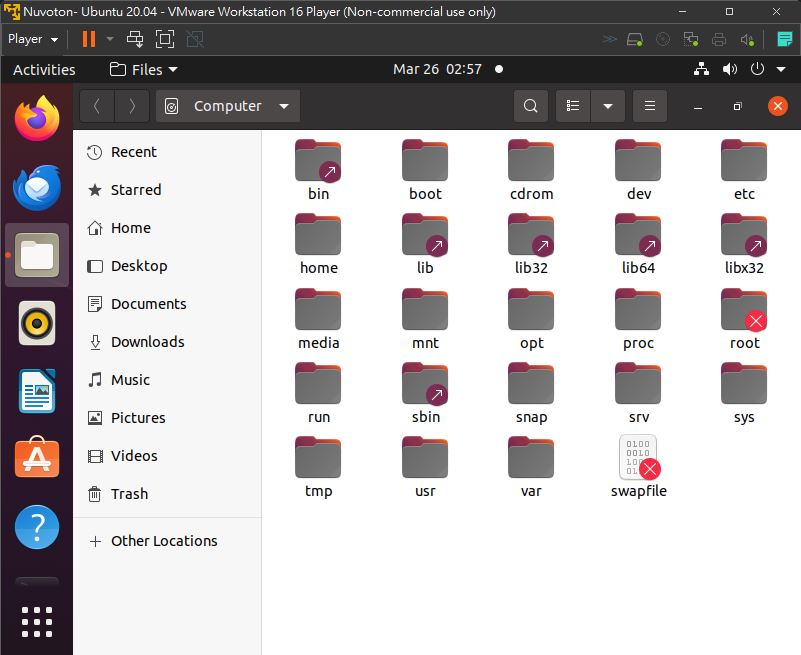
16.點選「電腦」。
17.對著etc資料夾連續按兩下滑鼠左鍵,開啟資料夾。
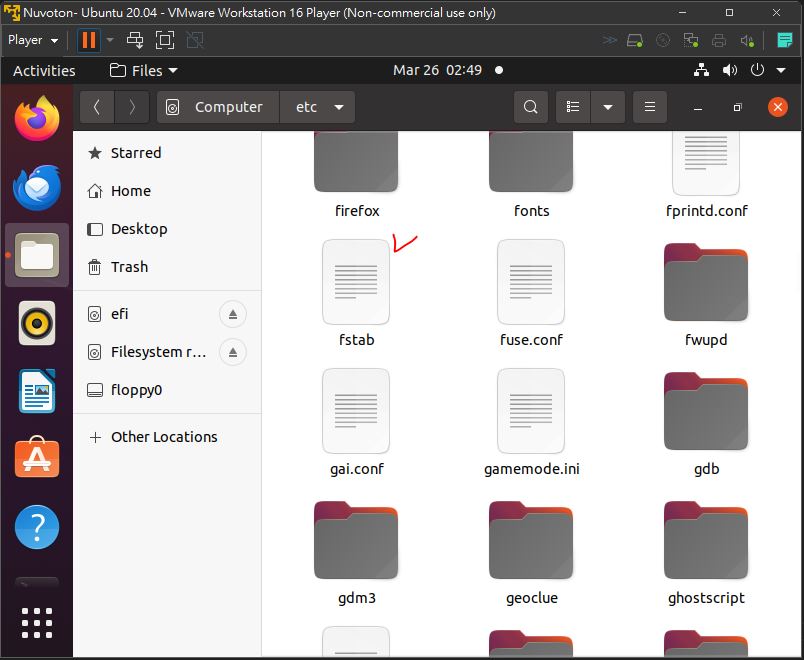
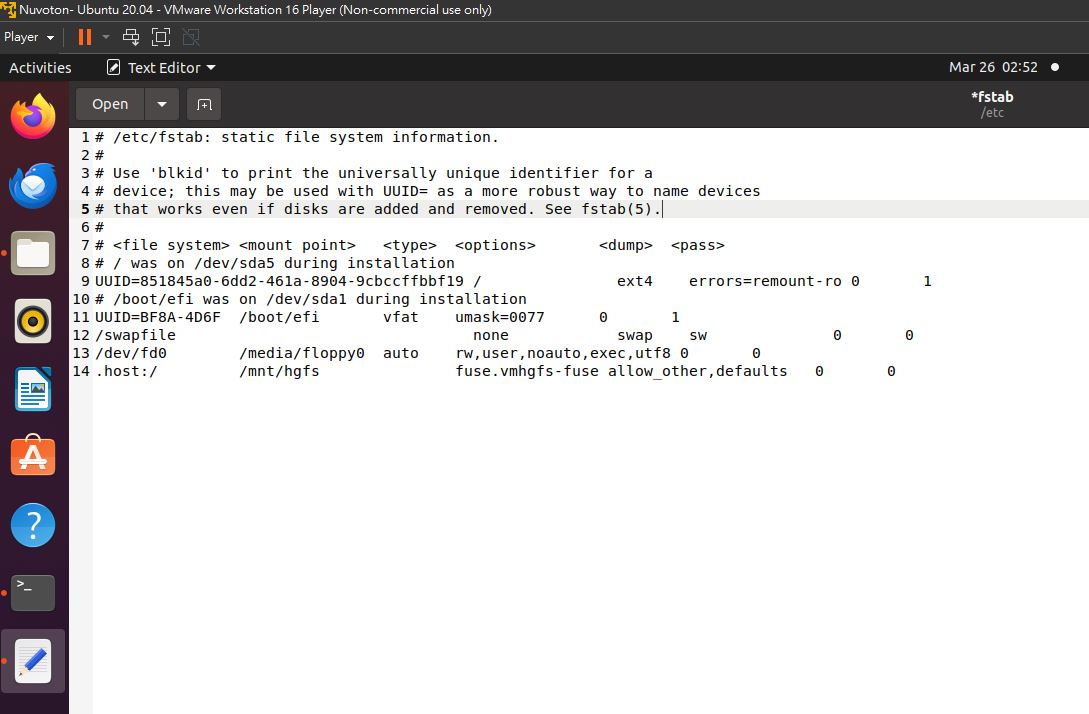
18.對著檔案fstab連續按兩下滑鼠左鍵,開啟檔案。
19.開啟的fstab內容如下圖所示。
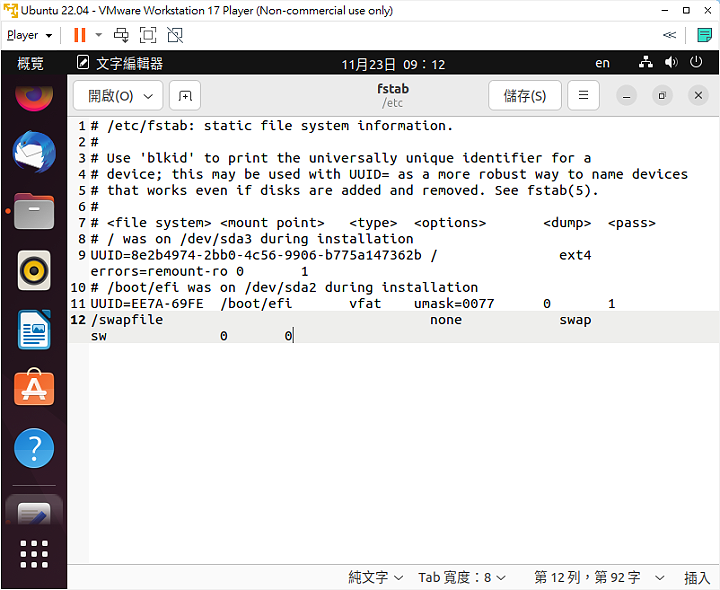
20.在程式的最後新增一行文字「.host:/ /mnt/hgfs fuse.vmhgfs-fuse allow_other,defaults 0 0」,點選「儲存」,以後開機就會自動掛載分享的資料夾。
.host:/ /mnt/hgfs fuse.vmhgfs-fuse allow_other,defaults 0 0
21.save 並 關閉fstab。
22.關閉檔案。
23.輸入「exit」,結束終端機。
24.點選「電源」,選擇「關閉電源」。
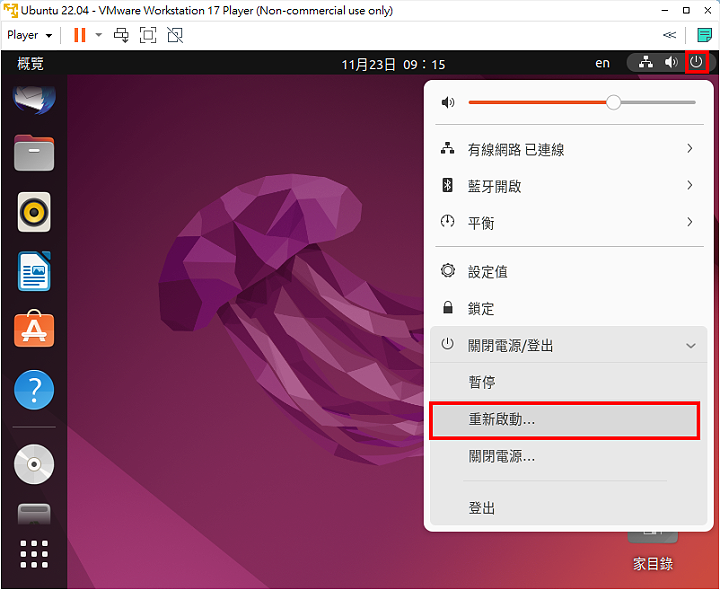
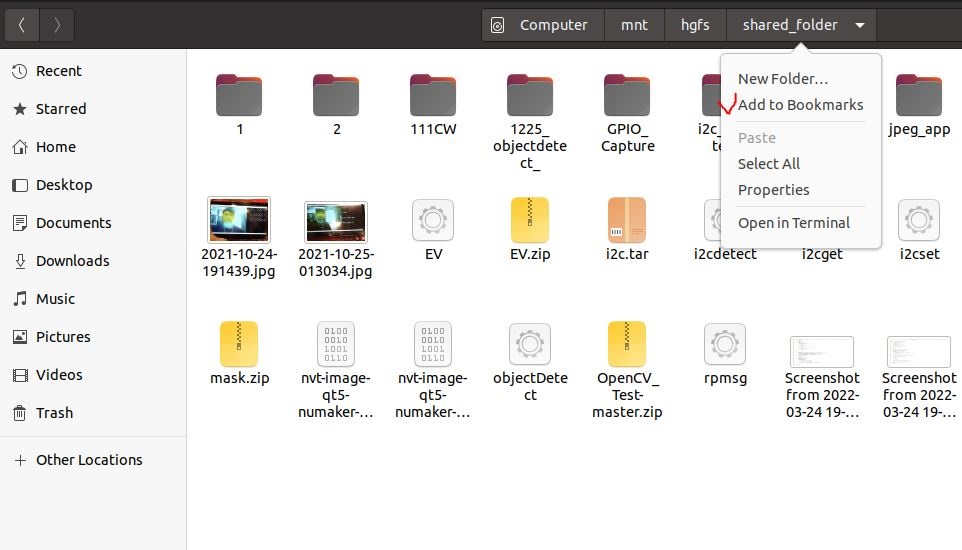
25.點選「重新開機」。
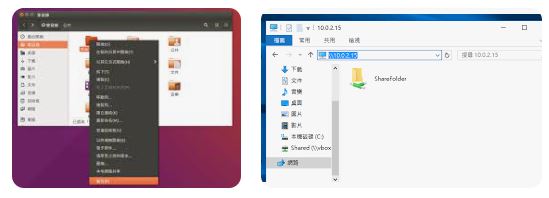
26.重新開機以後,點選「檔案」,選擇「+其他的位置」。
27.選擇「電腦」。
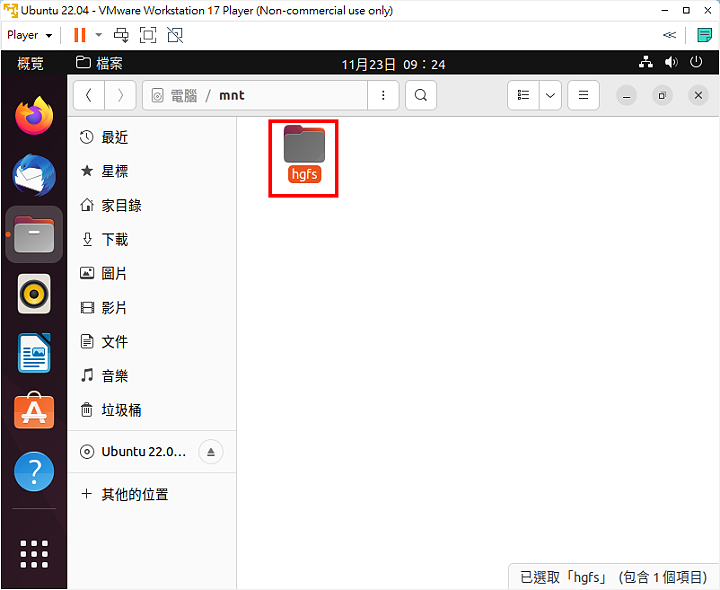
28.對著mnt連續按兩下滑鼠左鍵,開啟資料夾。
29.對著hgfs連續按兩下滑鼠左鍵,開啟資料夾。
30.將分享資料夾,到 bookmarks